

Manuel d'utilisation du scooter électrique BOYUEDA G2/G6
Manuel d'utilisation du scooter électrique BOYUEDA G2 / G6

Sommaire
- Préface2
- Consignes de sécurité3–4
- Vérifications avant utilisation4
- Guide de conduite5–6
- Utilisation correcte du système de contrôle électronique6–7
- Utilisation correcte des batteries7
- Utilisation correcte du chargeur8
- Présentation du tableau de bord9
- Téléchargement de l'application10
- Connexion à l'application11
- Méthode de démarrage12
- Informations sur les paramètres du véhicule G213–14
- Informations sur les paramètres du véhicule G615–16
- Installation pour les débutants G217
- Installation pour les débutants G618
- Réparations / entretien19
- Résolution des pannes20
- Service après-vente21–22
Ce livret couvre à la fois le BOYUEDA G2 (mono-moteur) et le BOYUEDA G6 (bi-moteur). Suivez la section sur les paramètres et l'installation correspondant à votre modèle. Le téléchargement et la connexion à l'application s'appliquent uniquement au G6.
1
Préface
Cher client :
Nous vous remercions d'avoir choisi notre scooter électrique. Vous découvrirez rapidement comment ses performances puissantes, son ingénierie exceptionnelle et sa qualité de fabrication premium transforment chaque trajet en une expérience fluide et agréable, qu'il s'agisse de vos trajets quotidiens ou d'une aventure le week-end.
Nous sommes honorés de la confiance que vous accordez à notre marque. Notre conviction fondamentale — « La technologie au service d'une mobilité sans effort » — nous pousse à associer innovation de pointe et design adapté à votre style de vie. Chaque produit reflète notre engagement envers trois piliers : une ingénierie intelligente, des trajets joyeux et une sécurité sans compromis. Nous vivons selon ces principes : placer les utilisateurs au premier plan, offrir une qualité suprême et redéfinir l'excellence du service.
Portés par la volonté d'être pionniers d'une mobilité éco-responsable, nous innovons sans relâche pour intégrer des solutions énergétiques durables dans la vie quotidienne. Notre mission : zéro émission à l'échappement, zéro compromis environnemental. Grâce à notre leadership technologique, nous construisons des communautés plus propres tout en faisant progresser les normes de l'industrie, un trajet révolutionnaire à la fois.
Avant d'utiliser ce produit, veuillez lire attentivement le manuel, en portant une attention particulière aux consignes de sécurité. Conservez ce manuel pour toute référence ultérieure. Utilisez uniquement des pièces autorisées par notre entreprise. Pour toute question, veuillez contacter rapidement notre revendeur agréé ou le centre de service technique de l'entreprise.
L'entreprise sera heureuse de vous fournir un service ponctuel, efficace et de qualité.
2
Consignes de sécurité
- Maintenez les batteries à l'écart des flammes nues ou des sources d'inflammation. Évitez la proximité avec des environnements inflammables/explosifs ou des matériaux corrosifs.
- Ne démontez pas le boîtier de la batterie pour éviter les courts-circuits qui pourraient endommager l'électronique du véhicule.
- Ne court-circuitez jamais les bornes positive et négative de la batterie avec des fils ou des conducteurs pour éviter tout risque de panne de batterie.
- Manipulez les batteries avec précaution pour éviter les chutes, qui pourraient endommager le boîtier et présenter des risques pour la sécurité.
- Chargez les batteries dans des zones sèches et bien ventilées, à l'abri de l'humidité et des environnements inflammables/explosifs.
- Ne démontez pas le chargeur de batterie dédié.
- Assurez-vous qu'aucun objet ne recouvre le chargeur ou la batterie pendant la charge pour éviter toute surchauffe.
- Chargez les batteries dans des endroits inaccessibles aux enfants.
- Ce produit est équipé d'une fonction de limitation de vitesse par changement de rapport. Dans des conditions normales, ne dépassez pas la limite de vitesse nationale de 25 km/h.
- Le démontage non autorisé du cadre du véhicule peut entraîner des risques pour la sécurité.
- Évitez de rouler sur des surfaces inégales (ex. : rails de chemin de fer, routes de gravier, escaliers) pour éviter les crevaisons, la déformation des jantes ou les dommages au véhicule.
- Lors d'un freinage brusque à haute vitesse ou en descente, utilisez uniquement le frein arrière pour éviter toute instabilité vers l'avant.
- Avant de rouler, inspectez et vérifiez le bon fonctionnement des freins, du cadre, du guidon, des roues et de la selle pour votre sécurité.
- N'appliquez pas d'huile sur les composants de frein (étrier, disque, frein V-brake, frein à tambour ou systèmes de freinage couplés), car cela pourrait provoquer une défaillance du freinage.
- Évitez de transporter des objets lourds sur le guidon pour ne pas perdre le contrôle.
- Le scooter est conçu pour une seule personne uniquement. La surcharge compromet la sécurité en raison de la capacité de puissance limitée.
- En cas de pluie, portez des vêtements imperméables. Ne tenez pas de parapluie en conduisant et respectez toujours le code de la route.
- Portez un casque et des équipements de protection par mesure de sécurité lors de l'utilisation.
- La signalisation réglementaire pour les installations de recharge et de stationnement des véhicules électriques suit des directives standardisées aux États-Unis.
3–4
Vérifications avant utilisation
- La selle doit être réglée dans une position confortable et sûre.
- Le tableau de bord doit afficher des relevés précis, et les feux ainsi que le klaxon doivent fonctionner correctement.
- Le levier de frein doit être sensible et fiable, et le moteur doit se désengager lors du freinage.
- L'accélérateur doit pivoter en douceur, revenir de manière fiable à sa position neutre et ne présenter aucun jeu.
- Les pneus avant et arrière doivent avoir une pression d'air adéquate, et les motifs d'usure doivent être normaux.
- Les pièces rotatives doivent bouger librement sans obstruction.
- L'écrou de l'axe avant doit être serré fermement sans jeu.
- L'écrou de l'axe arrière doit être serré fermement sans jeu.
- Vérifiez que la batterie est complètement chargée avant de partir.
- Le mécanisme de pliage de la colonne de direction doit être verrouillé en toute sécurité.
4
Guide de conduite
- Ne conduisez pas le scooter sans avoir lu attentivement ce manuel et compris ses spécifications de performance. Avant de rouler, inspectez tous les composants pour déceler tout dommage ou usure afin d'assurer une utilisation sûre. Contactez immédiatement le service client en cas de problème.
- Pour votre sécurité et celle des autres, respectez le code de la route local. Roulez uniquement sur les voies lentes désignées. Ne transportez jamais de passager, le scooter n'étant pas conçu pour un poids supplémentaire. Évitez les terrains inégaux ou escarpés ; réduisez votre vitesse ou descendez du scooter pour traverser ces zones à pied. Soyez prudent sur les surfaces glissantes : ralentissez et évitez de rouler sous la pluie, la neige ou sur des routes mouillées.
- Le scooter est résistant à l'eau mais n'est pas étanche. L'exposition à de fortes pluies peut endommager les composants internes tels que le moteur et le boîtier de la batterie. Toute pénétration d'eau annulera la garantie.
- Les performances de la batterie dépendent de la température. À des températures inférieures à 0 °C, la capacité de la batterie peut diminuer de 10 à 20 %, réduisant ainsi l'autonomie. Les performances se normaliseront lorsque les températures remonteront.
- Rangez le scooter dans un endroit sec et frais, à l'écart des produits chimiques corrosifs. Évitez une exposition prolongée à la lumière directe du soleil ou à la pluie pour éviter les défaillances électriques pouvant causer des dysfonctionnements ou des accidents.
- Ne laissez pas des personnes inexpérimentées utiliser le scooter. Seules les personnes familiarisées avec ses commandes doivent l'utiliser.
- Ralentissez lors des virages ; évitez les manœuvres brusques. Respectez les panneaux de signalisation en tout temps. Utilisez les indicateurs de niveau de batterie (plus il y a de LED allumées, plus l'autonomie restante est importante) pour surveiller le niveau de charge. Si des anomalies surviennent (ex. : défaillance des freins, perte de puissance soudaine, ou freins non réactifs), arrêtez-vous immédiatement et faites inspecter le scooter par un centre de service agréé. Ne continuez pas à rouler.
- Réglez soigneusement la hauteur du guidon et de la selle. Assurez-vous que les marques de réglage sur la potence ou la tige de selle sont visibles et sécurisées. Un serrage excessif ou insuffisant peut compromettre la sécurité.
- Placez vos deux pieds sur les repose-pieds avant de démarrer. Utilisez votre main droite pour tourner lentement l'accélérateur vers l'intérieur (vers votre corps) pour accélérer. Relâchez l'accélérateur pour réduire la vitesse : il reviendra automatiquement à sa position neutre et le moteur s'arrêtera.
- Tous les modèles incluent une fonction de coupure de frein : actionner le levier de frein gauche ou droit coupe instantanément l'alimentation du moteur, assurant des arrêts en toute sécurité. Ne faites pas fonctionner le scooter sans avoir lu ce manuel et compris ses limites de performance. Avant de rouler, vérifiez soigneusement que toutes les pièces sont intactes. Contactez-nous en cas de problème détecté.
- Certains modèles disposent d'une fonction de régulation automatique de la vitesse. Pour l'activer : maintenez l'accélérateur stable pendant 5 à 8 secondes, et le scooter maintiendra automatiquement cette vitesse. En cas d'urgence, actionnez les freins ou tournez à nouveau l'accélérateur pour désengager immédiatement le régulateur.
5–6
Utilisation correcte du système de contrôle électronique
- Le système de contrôle électronique se compose d'un contrôleur, d'un indicateur de niveau de batterie, d'un interrupteur de régulation de vitesse (accélérateur) et d'une poignée combinée.
- Le contrôleur assure une régulation de vitesse en continu, une protection contre l'arrêt par freinage, une protection contre les sous-tensions et une protection contre les surintensités.
- Le contrôleur régit la vitesse du moteur et est directement lié aux performances de conduite. Tournez l'accélérateur lentement. Une force excessive pourrait endommager le régulateur.
- Maintenez régulièrement le boîtier du contrôleur propre pour faciliter la dissipation thermique. Vérifiez que le faisceau de câbles du contrôleur est solidement connecté. Si une interface devient chaude ou se déforme, remplacez-la ou réparez-la immédiatement.
- Inspectez régulièrement l'accélérateur et le frein moteur. Si l'accélérateur est lâche, ne se remet pas en place à temps, ou si le frein moteur ne parvient pas à couper la puissance, réparez ou remplacez les pièces concernées immédiatement.
- Si le contrôleur n'affiche pas la tension ou les indicateurs, envoyez-le à un centre de service agréé pour réparation.
- Si l'autonomie diminue de manière significative, vérifiez s'il y a une défaillance de la protection contre les surintensités du contrôleur ou d'autres causes. Le contrôleur lui-même doit être envoyé à un centre de service agréé pour réparation ou remplacement.
6–7
Utilisation correcte de la batterie
- Maintenez la batterie complètement chargée lorsqu'elle n'est pas utilisée. Le stockage dans un état déchargé réduira considérablement la durée de vie de la batterie.
- Si le scooter n'est pas utilisé pendant une longue période, rechargez la batterie périodiquement (généralement une fois par mois).
- Maintenez les batteries à l'écart des flammes nues et des sources de chaleur élevée. Ne jetez jamais une batterie dans le feu. N'exposez pas la batterie à la lumière directe du soleil pendant des périodes prolongées.
- Évitez toute surcharge pendant le processus de charge.
- Si le câblage est endommagé, ou si la batterie est déformée, remplacez-la immédiatement.
- Ne connectez jamais les bornes positive et négative avec un fil ou un autre conducteur. Cela peut créer un danger et endommager la batterie.
- La température recommandée pour la batterie est de 5 à 30 °C. En été, garez le scooter dans une zone ombragée et bien ventilée. En hiver, stockez la batterie dans la plage de température recommandée.
- Ne chargez pas immédiatement après un long trajet. Laissez le scooter reposer pendant environ 30 minutes pour dissiper la chaleur avant de charger.
7
Utilisation correcte du chargeur
- Chargez la batterie immédiatement après la fin du trajet ou lorsque la tension de la batterie diminue. Pour un stockage à long terme, maintenez la batterie suffisamment chargée et rechargez-la chaque mois. Éteignez toujours l'interrupteur d'alimentation du scooter avant de charger.
- Chargez dans une zone sèche et bien ventilée, à l'écart des enfants, de l'humidité et de tout matériau inflammable ou explosif.
- Utilisez uniquement le chargeur dédié du fabricant. L'utilisation de chargeurs non autorisés peut endommager la batterie ou réduire sa durée de vie. L'utilisateur assume la responsabilité en cas d'utilisation de chargeurs non conformes.
- Alignez l'encoche de la prise de sortie du chargeur avec la languette saillante de la prise de charge du scooter.
- Ne chargez pas pendant plus de 18 heures consécutives.
- Ne connectez pas le chargeur au secteur en premier. Suivez cet ordre : branchez la sortie CC du chargeur (côté basse tension) dans le port de charge du scooter, puis branchez l'entrée CA dans la prise murale. Le témoin d'alimentation du chargeur s'allume lorsque la charge commence. La charge est terminée lorsque le témoin devient vert.
- Après la charge, débranchez d'abord le chargeur de la prise secteur, puis retirez la fiche CC du scooter.
- Placez le chargeur sur une surface stable. Confirmez que l'étiquette de tension correspond à votre alimentation locale. Si le chargeur fonctionne mal, arrêtez immédiatement de l'utiliser et contactez le support client.

Rappel
Utilisez toujours le chargeur dédié fourni par le fabricant. Assurez-vous que la connexion au port de charge est sécurisée avant de brancher sur le secteur. Ne laissez pas la batterie en charge pendant plus de 18 heures consécutives.
8
Présentation du tableau de bord

Commandes au guidon
- Levier de frein (vérification)
- Poignée en latex
- Interrupteur des phares
- Clignotant (auto)
- Haut-parleur / klaxon
- Mode de conduite
- Clé de démarrage — allumage/extinction
- Changement de moteur
- Vitesses
- Accélérateur
- État du véhicule
Éléments du tableau de bord
- Mode de conduite (ex. : ECO)
- Informations de charge et niveau de batterie
- Affichage de la vitesse (km/h)
- Indicateur de vitesse
- Activation NFC / Zone de détection CLÉ INTELLIGENTE
- Informations du véhicule — ODO / TRIP
- Affichage mono / bi-moteur
9
Téléchargement de l'application
Application mobile pour connecter le véhicule :
- Android : Ouvrez votre navigateur, scannez le code QR ci-dessous et téléchargez l'application.
- iPhone : Ouvrez l'App Store, recherchez my-trip et téléchargez.
Ouvrez l'application et sélectionnez votre langue préférée (English, 简体中文, العربية, Deutsch, Русский язык, Français).

Remarque : Le téléchargement et la connexion à l'application s'appliquent uniquement au modèle G6. Le G2 n'est pas concerné.
Lien de téléchargement de l'application Android : http://xcx.liyazn.com/mytrip.apk
10
Connexion à l'application

Enregistrement de l'application (requis pour une fonctionnalité complète)
- Ouvrez l'application et appuyez sur My (Moi) dans la barre de navigation inférieure.
- Appuyez sur la zone No Login (Aucune connexion) en haut.
- Sur l'écran de connexion, appuyez sur Registered Account (Compte enregistré).
- Saisissez le nom d'utilisateur, le mot de passe, confirmez le mot de passe et l'adresse e-mail, puis terminez l'inscription.
Connexion à l'application (le couplage est requis pour une fonctionnalité complète)
- Sur l'écran du tableau de bord du véhicule, appuyez sur l'icône Bluetooth.
- Sélectionnez le nom Bluetooth de votre véhicule dans la liste de découverte (par ex. LIVIAE–xxxx).
- Scannez le code QR situé au dos du compteur, ou saisissez les caractères affichés sur le compteur.
- Le code QR se trouve au dos du compteur, comme indiqué sur l'image.
11
Méthode de démarrage

Démarrage par mot de passe
- Appuyez brièvement sur la touche de démarrage pour allumer l'écran.
- Saisissez le premier chiffre du mot de passe.
- Saisissez le deuxième chiffre du mot de passe.
- Saisissez le troisième chiffre du mot de passe.
- Saisissez le quatrième chiffre du mot de passe.
- Démarrage réussi : le tableau de bord s'allume.
Le mot de passe peut être modifié dans les paramètres du système ou de l'application.
Activation NFC
- Appuyez brièvement sur la touche de démarrage pour allumer l'écran.
- Placez la carte SMART KEY dans la zone de détection sur le tableau de bord.
12
Informations sur les paramètres du véhicule G2


Dimensions
| Hauteur dépliée | 120–134 cm (réglable) |
| Longueur dépliée | 128 cm |
| Garde au sol | 16 cm |
| Hauteur pliée | 60 cm |
| Longueur pliée | 128 cm |
Spécifications
| Modèle du produit | Trottinette électrique G2 (moteur simple) |
| Matériau du produit | Alliage d'aluminium renforcé pour tout le corps |
| Capacité maximale | 150 kg |
| Pneus | Pneu tubeless antidéflagrant de 10 pouces |
| Vitesse maximale | 55 km/h |
| Autonomie | 60–70 km |
| Batterie | 52V 19Ah / 988Wh |
| Poids | Environ 32,2 kg |
| Puissance du moteur | Moteur simple 1600W |
| Frein | Frein à disque hydraulique avant et arrière + frein électronique EBAS |
| Amortissement avant | Amortisseur à ressort |
| Amortissement arrière | Amortisseur à ressort |
| Auto-vérification | L'instrument peut afficher des codes d'erreur |
| Contrôleur | Contrôleur 52V 28A |
Éclairage
- Clignotants
- Lumières sur les bords du plateau
- Feux de freinage arrière
- Lumières LED carrées
13–14
Informations sur les paramètres du véhicule G6


Dimensions
| Hauteur dépliée | 128 cm |
| Longueur dépliée | 129 cm |
| Garde au sol | 14,5 cm |
| Hauteur pliée | 59 cm |
| Longueur pliée | 129 cm |
Spécifications
| Modèle du produit | Trottinette électrique G6 (double moteur) |
| Matériau du produit | Alliage d'aluminium renforcé pour tout le corps |
| Capacité maximale | 150 kg |
| Pneus | Pneu tubeless antidéflagrant de 10 pouces |
| Vitesse maximale | 85 km/h |
| Autonomie | 80–100 km |
| Batterie | 52V 28Ah / 1456Wh |
| Poids | Environ 30,2 kg |
| Puissance du moteur | Moteur simple 1600W / double moteur 3200W |
| Frein | Frein à disque hydraulique avant et arrière + frein électronique EBAS |
| Amortissement avant | Amortisseur à ressort |
| Amortissement arrière | Amortisseur à ressort |
| Auto-vérification | L'instrument peut afficher des codes d'erreur |
| Contrôleur | Contrôleur 52V 28A × 2 |
Éclairage
- Clignotants
- Lumières sur les bords du plateau
- Feux de freinage arrière
- Lumières LED carrées
15–16
Installation pour débutant G2

Assemblage du guidon
- Relevez le guidon jusqu'à ce qu'il se verrouille en place.
- Tournez dans le sens des aiguilles d'une montre pour serrer et verrouiller la poignée.
- Retirez les vis de fixation du guidon.
- Insérez les guidons dans les fentes correspondantes.
- Remettez les vis en place et serrez-les.
- Vérifiez que le levier de frein, l'interrupteur des phares, le commutateur de double moteur et l'instrument sont solidement fixés.
Réglage de la hauteur
- Ouvrez le fermoir.
- Appuyez sur le mécanisme de verrouillage pour régler la hauteur.
- Réglez à la hauteur souhaitée et verrouillez le loquet.
17
Installation pour débutant G6

Assemblage du guidon
- Relevez le guidon jusqu'à ce qu'il se verrouille en place.
- Appuyez sur la languette de verrouillage jusqu'à ce qu'elle s'enclenche.
- Retirez les vis de fixation du guidon.
- Insérez les guidons dans les fentes correspondantes.
- Remettez les vis en place et serrez-les.
- Vérifiez que le levier de frein, l'interrupteur des phares, le commutateur de double moteur et l'instrument sont solidement fixés.
Méthode de pliage du G6
- Accrochez le loquet de sécurité n° 1 et tirez-le vers le haut.
- Utilisez votre pouce pour ouvrir le fermoir.
- Tenez le guidon et retirez le loquet de sécurité n° 2.
18
Entretien et réparation du véhicule
Couple de serrage recommandé (N·m)
| Roue avant | Roue arrière | Tube de selle | Selle | Tube vertical | Tube central | Fourche avant |
|---|---|---|---|---|---|---|
| ≥18 | ≥30 | ≥18 | ≥18 | ≥18 | ≥18 | ≥18 |
Entretien régulier
A : Vérifier S : Ajuster D : Remplacer L : Lubrifier T : Serrer
| Élément d'inspection | 60 jours | 180 jours | 360 jours |
|---|---|---|---|
| Rotation du guidon ; pièces de direction desserrées ou usées | S, T | A, T | A, L |
| Pression et usure des pneus | — | A | D |
| Essieu avant/arrière et usure associée | T | A, L | A, L |
| Usure des mâchoires de frein | — | D | D |
| Voile ou déformation de la jante | — | A | A |
| Déformation ou bosses sur le cadre et la fourche | — | A | A |
| Efficacité du freinage | A | A | A |
| Position du levier de frein | S | S | S |
| Fonctionnement du klaxon et des phares | — | A | A |
| Usure de la prise du chargeur et du cordon d'alimentation | — | A | A |
| Hauteur de la selle et du guidon | S | S | S |
19
Élimination des pannes courantes du véhicule
| N° | Phénomène de panne | Cause possible | Solution |
|---|---|---|---|
| 1 | Le tableau de bord ne s'allume pas | Interrupteur d'alimentation endommagé ; tension de batterie trop faible ; fusible grillé | Remplacer l'interrupteur par un modèle identique ; charger la batterie ; remplacer le fusible par un modèle identique |
| 2 | Le moteur ne fonctionne pas | Problème de connexion de la batterie ; prise/connecteur du moteur desserré ou endommagé ; câblage de l'accélérateur desserré | Réparer la connexion ; envoyer à un centre de service ; réparer ou resouder le câblage de l'accélérateur |
| 3 | Autonomie insuffisante après une charge complète | Pression des pneus faible ; batterie vieillissante ou endommagée ; charge incomplète ou chargeur défectueux ; démarrages/freinages fréquents, vent de face, montée ou charge lourde | Gonfler les pneus ; remplacer la batterie ; charger complètement ou réparer le chargeur ; réduire la charge et aider en poussant si nécessaire |
| 4 | Le chargeur ne charge pas | Prise/connecteur débranché ou mauvais contact ; chargeur endommagé ; batterie endommagée ; fusible de la batterie grillé | Fixer les prises et connecteurs et enlever la saleté ; réparer le chargeur ; remplacer la batterie ; remplacer le fusible par un modèle identique |
| 5 | Autres pannes | Ne peut pas être résolu avec les conseils ci-dessus ; dommage interne au moteur, au contrôleur, au chargeur ou à la batterie | Contacter le fournisseur ou un centre de réparation agréé. L'ouverture non autorisée de ces composants peut annuler la garantie |
20
-
Batterie d'origine pour scooters électriques BOYUEDA
Prix habituel Du €369,00 EURPrix habituelPrix unitaire par€309,00 EURPrix promotionnel Du €369,00 EURSafe & Secure Payments


-
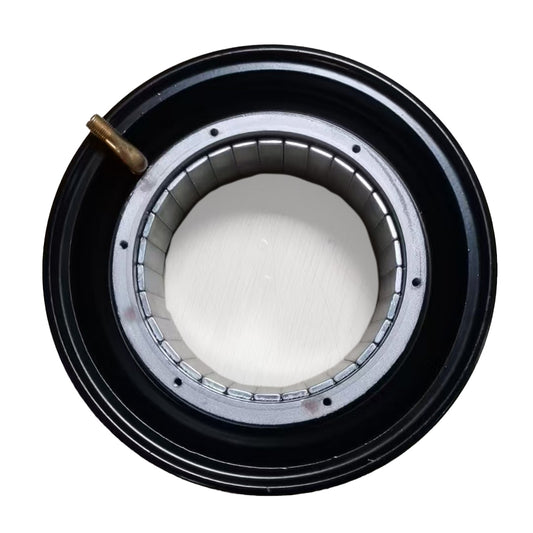
Moteur d'origine (avec pneu) pour scooters électriques Boyueda
Prix habituel Du €299,00 EURPrix habituelPrix unitaire par€449,00 EURPrix promotionnel Du €299,00 EURSafe & Secure Payments
En vente -
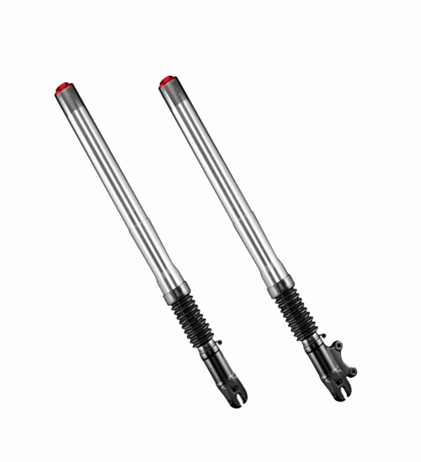
Fourche avant d'origine (arbre de direction) pour trottinettes électriques Boyueda
Prix habituel €149,00 EURPrix habituelPrix unitaire par€159,00 EURPrix promotionnel €149,00 EURSafe & Secure Payments
En vente -
Original Rim / Moyeu pour trottinettes électriques Boyueda
Prix habituel Du €149,00 EURPrix habituelPrix unitaire par -
Plaque acrylique transparente pour la position de pédale d'origine du scooter Boyueda S5-11
Prix habituel €129,00 EURPrix habituelPrix unitaire par -
Ensemble de selle d'origine pour trottinette électrique Boyueda
Prix habituel €129,00 EURPrix habituelPrix unitaire par€109,00 EURPrix promotionnel €129,00 EURSafe & Secure Payments
-
 €20OFF
Casque intégral de scooter
Prix habituel €119,00 EURPrix habituelPrix unitaire par€139,00 EURPrix promotionnel €119,00 EURSafe & Secure Payments
En vente -
Amortisseur de direction d'origine pour Boyueda M2 / S5-11 / S3-11
Prix habituel Du €99,00 EURPrix habituelPrix unitaire par€105,00 EURPrix promotionnel Du €99,00 EURSafe & Secure Payments
En vente -
Moteur d'origine (avec pneu) pour scooters électriques Boyueda
Prix habituel €95,00 EURPrix habituelPrix unitaire par€115,00 EURPrix promotionnel €95,00 EURSafe & Secure Payments
En vente -
Ensemble complet de pièces pliantes d'origine pour trottinettes électriques Boyueda
Prix habituel €95,00 EURPrix habituelPrix unitaire par -
Compteur d'affichage LY 810 original avec cartes NFC pour trottinettes électriques Boyueda S5-11, M2 et Q7 Pro Max
Prix habituel €89,00 EURPrix habituelPrix unitaire par -
Fourche Avant Originale Pour Trottinettes Électriques Boyueda
Prix habituel Du €89,00 EURPrix habituelPrix unitaire par€209,00 EURPrix promotionnel Du €89,00 EURSafe & Secure Payments
En vente -
Selle d'origine pour trottinette électrique Boyueda
Prix habituel €79,00 EURPrix habituelPrix unitaire par€109,00 EURPrix promotionnel €79,00 EURSafe & Secure Payments
En vente -
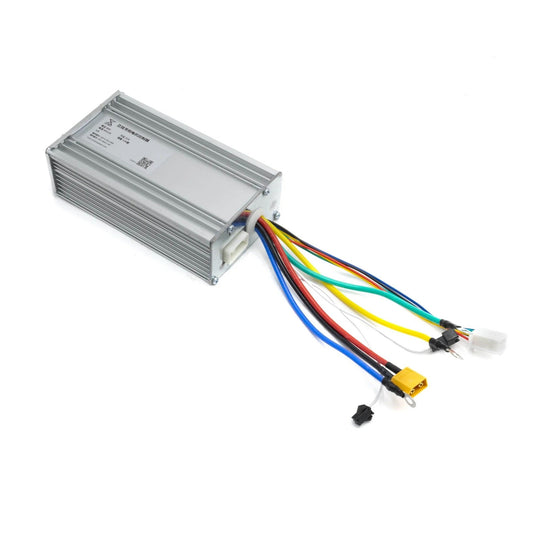
Contrôleur d'origine pour scooters électriques BOYUEDA
Prix habituel Du €79,00 EURPrix habituelPrix unitaire par€99,00 EURPrix promotionnel Du €79,00 EURSafe & Secure Payments
En vente





-
Trottinette électrique tout-terrain BOYUEDA M2 72V 10000W avec écran NFC Bluetooth et amortisseur de direction
 10 000 W Brush-Less Motor
 72V40Ah UL certification
 150 km Max Range
 95KM/h Max SpeedPrix habituel €1.699,00 EURPrix habituelPrix unitaire par
€2.299,00 EURPrix promotionnel €1.699,00 EURSafe & Secure Payments
En vente -

Trottinette électrique tout-terrain BOYUEDA S5-11 avec écran Bluetooth et amortisseur de direction
6000 W Brush-Less Motor
60V 38Ah UL certification
120 KM Max Range
85 KM/h Max SpeedPrix habituel €1.269,00 EURPrix habituelPrix unitaire par€1.599,00 EURPrix promotionnel €1.269,00 EURSafe & Secure Payments
En vente -
[Prévente] Trottinette électrique tout-terrain puissante BOYUEDA S3-11
6000 W Brush-Less Motor
60V 38Ah UL certification
120 KM Max Range
85 KM/h Max SpeedPrix habituel €1.179,00 EURPrix habituelPrix unitaire par€1.499,00 EURPrix promotionnel €1.179,00 EURSafe & Secure Payments
En vente -
Trottinette électrique pliable BOYUEDA G6 à double moteur (Nouveauté 2026)
3200 W Brush-Less Motor
52V28Ah UL certification
120 km Max Range
70 km/h Max SpeedPrix habituel €899,00 EURPrix habituelPrix unitaire par€1.099,00 EURPrix promotionnel €899,00 EURSafe & Secure Payments
En vente -
Trottinette électrique de ville pliable connectée Bluetooth avec écran BOYUEDA Q7 Pro Max
3200 W Brush-Less Motor
52V 28Ah UL certification
110 KM Max Range
70 KM/h Max SpeedPrix habituel €889,00 EURPrix habituelPrix unitaire par€1.099,00 EURPrix promotionnel €889,00 EURSafe & Secure Payments
En vente -
Trottinette électrique pliable BOYUEDA Q7 PRO
3200 W Brush-Less Motor
52V 19Ah UL certification
70 KM Max Range
70 KM/h Max SpeedPrix habituel €739,00 EURPrix habituelPrix unitaire par€899,00 EURPrix promotionnel €739,00 EURSafe & Secure Payments
En vente -
BOYUEDA G2 2026 Nouvelle Arrivée Trottinette Électrique Pliable Tendance 1600W
1 600 W Brush-Less Motor
52V19Ah UL certification
70 KM Max Range
50 km/h Max SpeedPrix habituel €649,00 EURPrix habituelPrix unitaire par€859,00 EURPrix promotionnel €649,00 EURSafe & Secure Payments
En vente


