


BOYUEDA M2 E-Scooter User Manual
Warning Items
- Keep batteries away from open flames or ignition sources. Avoid proximity to flammable/explosive environments or corrosive materials.
- Do not disassemble the battery housing to prevent short circuits that could damage the vehicle's electronics.
- Never short-circuit the battery's positive and negative terminals with wires or conductors to avoid hazards and potential battery failure.
- Handle batteries with care to prevent drops, which may damage the casing and pose safety risks.
- Charge batteries in dry, well-ventilated areas, away from moisture and flammable/explosive environments.
- Do not disassemble the dedicated battery charger.
- Ensure no objects cover the charger or battery during charging to prevent overheating.
- Charge batteries in areas inaccessible to children.
- This product features a gear-switching speed limit function. Under normal conditions, do not exceed the national speed limit of 25 km/h (15.5 mph).
- Unauthorized disassembly of the vehicle frame may create safety hazards and latent risks.
- Avoid riding on uneven surfaces (e.g., railway tracks, gravel roads, stairs) to prevent tire blowouts, rim deformation, or vehicle damage.
- When braking abruptly at high speeds or downhill, use only the rear brake to avoid forward instability.
- Before riding, inspect and confirm the functionality of brakes, frame, handlebars, wheels, and saddle for safety.
1
Warning Items
- Do not apply oil to brake components (caliper, disc, V-brake, drum brake, or linked brake systems), as this may cause brake failure.
- Avoid carrying heavy objects on the handlebars to prevent loss of control.
- The scooter is designed for single riders only. Overloading compromises safety due to limited power capacity.
- In rain, wear waterproof clothing. Do not hold an umbrella while riding, and always follow traffic laws.
- Wear a helmet and protective gear for safety during operation.
- Regulatory signage for electric vehicle charging and parking facilities follows standardized guidelines in the U.S.
Check Before Riding
- The saddle must be adjusted to a comfortable and safe position.
- The instrument panel must display accurate readings, and the lights and horn must function properly.
- The brake lever must be sensitive and reliable, and the motor must disengage during braking.
- The throttle must rotate smoothly, return reliably to neutral, and have no play or looseness.
- Front and rear tires must have adequate air pressure, and wear patterns must appear normal.
- Rotating parts must move freely without obstruction.
- The front axle nut must be tightened securely with no loosening.
- The rear axle nut must be tightened securely with no loosening.
- Check that the battery is fully charged before riding.
- The folding mechanism of the steering pole must be locked securely in place.
2
Cycling Guide
- Do not ride the scooter without thoroughly reading this manual and understanding its performance specifications. Before riding, inspect all components for damage or wear to ensure safe operation. Contact customer support immediately if any issues are detected.
- For your safety and others', obey local traffic laws. Ride in designated slow lanes only. Never carry passengers, as the scooter is not designed for additional weight. Avoid uneven or steep terrain; reduce speed or dismount and push the scooter through such areas. Exercise caution on slippery surfaces—slow down, and avoid riding in rain, snow, or on wet roads.
- The scooter is water-resistant but not waterproof. Exposure to heavy rain may damage internal components like the motor and battery housing. Water ingress will void the warranty.
- Battery performance is temperature-sensitive. At temperatures below 0℃ (32°F), battery capacity may decrease by 10–20%, reducing range per charge. Performance will normalize as temperatures rise.
- Store the scooter in a dry, cool area away from corrosive chemicals. Avoid prolonged exposure to direct sunlight or rain to prevent electrical failures that could cause malfunctions or accidents.
- Do not allow inexperienced riders to use the scooter. Only individuals familiar with its controls should operate the device.
- Slow down when turning; avoid sharp maneuvers. Follow traffic signs at all times. Use battery indicator lights (more lit LEDs = longer remaining range) to monitor charge levels. If anomalies occur (e.g., brake failure, sudden power loss, or non-responsive brakes), stop immediately and have the scooter inspected by an authorized service center. Do not continue riding.
- Adjust handlebar and saddle height carefully. Ensure the adjustment marks on the stem or seat post are visible and secure. Over-tightening or under-tightening can compromise safety.
3
- Place both feet on the footrests before starting. Use your right hand to slowly twist the throttle inward (toward your body) to accelerate. Release the throttle to reduce speed—the throttle will automatically return to its neutral position, and the motor will stop.
- All models include a brake cutoff feature: Squeezing either left or right brake lever instantly cuts power to the motor, ensuring safe stops. Important: Do not operate the scooter without first reading this manual and understanding its performance limitations.
- Some models have an automatic speed control function. To activate: Hold the throttle steady for 5–8 seconds, and the scooter will maintain that speed automatically. In emergencies, apply the brakes or twist the throttle again to disengage cruise control immediately.
Correct Use of Electronic Control System
Place both feet on the footrests before starting. Use your right hand to slowly twist the throttle inward (toward your body) to accelerate. Release the throttle to reduce speed—the throttle will automatically return to its neutral position, and the motor will stop.
All models include a brake cutoff feature: Squeezing either left or right brake lever instantly cuts power to the motor, ensuring safe stops. Important: Do not operate the scooter without first reading this manual and understanding its performance limitations.
Some models have an automatic speed control function. To activate: Hold the throttle steady for 5–8 seconds, and the scooter will maintain that speed automatically. In emergencies, apply the brakes or twist the throttle again to disengage cruise control immediately.
4
Users should regularly inspect the steering mechanism and power brake system. If there is looseness when turning the handlebar, delayed reset functionality, or the power brake fails to cut power to the motor, the affected parts must be repaired or replaced immediately.
If the controller fails to display pressure readings or indicators, please send it to an authorized service center for repair.
If the vehicle's range (mileage) drops significantly, the user must check for over-current protection failure in the controller or other potential causes. However, the controller itself must be sent to an authorized service center for repair or replacement.
Correct Use of Battery
- Avoid Deep Discharge: Always keep the battery fully charged when not in use. Letting the battery drain completely can severely reduce its lifespan.
- Monthly Charging: If storing the scooter long-term, recharge the battery at least once every 30 days to maintain optimal performance.
- Avoid Heat/Fire Hazards: Never expose the battery to open flames, sparks, or high-temperature environments (e.g., direct sunlight, near heaters). Never throw batteries into fires or expose them to extreme heat.
- Prevent Overcharging: Do not leave the battery connected to the charger longer than necessary. Follow the manufacturer's recommended charging time.
- Avoid Short Circuits: Never connect the positive (+) and negative (−) terminals with metal objects (e.g., wires, tools), as this can cause sparks, damage, or fire.
- Ideal Storage Temperature: Store and charge the battery in temperatures between 5℃ and 30℃ (41°F–86°F). In summer, park your scooter in shaded, well-ventilated areas. In winter, store the battery indoors to avoid freezing temperatures.
- Cool-Down Before Charging: Do not charge immediately after a long ride. Allow the scooter to rest for 30 minutes to dissipate heat before plugging it in.
5
The Correct Use of the Charger
- Charge the battery immediately when the ride ends or when the battery voltage drops. Long-term storage: Store the battery with sufficient charge (50–80%). Recharge it monthly to maintain battery health. Always turn off the scooter's power switch before charging.
- Charge in a dry, well-ventilated area, away from: children, moisture, and direct sunlight. Flammable materials (e.g., paper, chemicals, or gases).
- Use only the manufacturer's dedicated charger. Using unauthorized chargers may damage the battery or reduce its lifespan. User assumes all responsibility for non-compliant chargers. Align the charger's output plug notch with the protruding tab on the scooter's charging port to ensure a secure connection.
- Do not charge for more than 18 consecutive hours to prevent overheating or battery damage.
- Never connect the charger to AC power first. Follow this order: Plug the charger's DC output (low-voltage side) into the scooter's charging port. Plug the charger's AC input (220V side) into the wall outlet. The charger's power indicator will light up when charging begins. Charging is complete when the indicator turns green.
- After charging: Unplug the charger from the AC outlet first, then remove the DC plug from the scooter.
- Place the charger on a stable, non-metallic surface during use. Verify the voltage label on the charger matches your local power supply (e.g., 110V vs. 220V). If the charger malfunctions, stop use immediately and contact customer support.

Reminder
Always use the dedicated charger provided by the manufacturer. Ensure the charging port connection is secure before plugging into AC power. Do not leave the battery on charge for more than 18 consecutive hours.
6
Function Display, Key Display


Handlebar Controls
- Boot key — power on/off
- Throttle (acceleration) — twist to accelerate
- Brake levers — left and right with brake cutoff
- Headlamp switch
- Turn signal (auto)
- Riding mode selector
- Motor switching / dual drive switch
- Gear selector
- Speaker / horn
- Driving mode switch
Dashboard Elements
- Speed display — km/h and mph
- Gear indicator — Comfort / Sport / Zero
- NFC activation status
- Charge information and battery level
- Vehicle information — ODO, TRIP, single/dual drive display
- Vehicle status indicators
- Boot key and gear status
- Riding mode and motor switching display
7
NFC Card Introduction

1. Card Overview
Three cards are included at the factory:
- Blue Main Card (primary card)
- White Sub-Cards (secondary cards)
2. Functionality of the Blue Main Card
The blue main card functions like a master key. It is typically stored securely at home and cannot be used to start the vehicle alone. If a white sub-card is lost and needs replacement: use the blue main card to pair a new white sub-card. Think of the blue main card as the "owner" and the white sub-card as the "guest." Guests require the owner's authorization (via the blue card) to access the system.
3. Pairing Process with the Blue Main Card
Prerequisite: Ensure the P96 setting is configured to "1" or "2" in the system menu.
Steps:
- Short press the power button (within 5 seconds).
- Swipe the blue main card over the NFC card reader area.
- When the dashboard displays "1", swipe the first white sub-card.
- When the dashboard displays "2", swipe the second white sub-card.
- If pairing a third white sub-card, do not swipe an arbitrary white card—only use a designated spare.
- Once pairing is complete, the dashboard will automatically shut down. Each subsequent startup requires swiping a paired white sub-card.
8
Mobile Phone APP Software to Connect the Vehicle
1. Android
Open your browser → Scan the QR code below → Download APP
1. iPhone
App Store → Search "My-Trip" → Get / Download


After installing, open the LIVIAE app and select your preferred language (English, 简体中文, Deutsch, Français, and others).
9
2. Register APP
Register for full functionality. Fill out basic information and register a new account. Provide username, password, confirm password, and email address.
Warning: If you do not fill in the email, you will not be able to recover a forgotten password.

3. Connect to the APP
Binding is required to access full functionality.
- Click on Bluetooth in the app.
- Click on your vehicle's QR code on the back of the scanner table, or enter the characters manually.
The QR code is on the back of the meter as shown in the picture.

10
Vehicle Components

Key labeled parts on the Boyueda M2:
- Headlight (Scheinwerfer)
- Throttle / Acceleration (Beschleunigung)
- Brake grip (Bremsgriff)
- Monitor (Computer / instrument display)
- Retractable clip
- Auto display
- Long-distance damping (front shock absorption)
- All-terrain tires
- Dual-charge dense multi-color lights
- Brake disc and brake caliper
11
Vehicle Parameters

| Product model | Dual-drive electric scooter |
| Product material | Reinforced full body aluminum alloy |
| Product tires | 11 inch explosion-proof tubeless tire |
| Max capacity | 200 KG |
| Fastest speed | 100 KM/H |
| Endurance | 90–110 KM |
| Weight | About 45 KG |
| Battery parameters | 72V 35A 2520Wh |
| Motor power | Single motor 5000W, dual motor 10000W |
| Brake | Front and rear double oil disc brake + EBAS electronic brake |
| Rear shock absorption | Rear hydraulic shock absorbers |
| Front shock absorption | Inverted long-distance hydraulic shock absorption |
| Controller | 72V 45A × 2 controller — the instrument can display fault codes (self check) |
Car Lights
- With turn signal lamp
- With pedal edge lamp
- With rear brake lamp
- With double U7 headlights
12
Unpacking and Opening Installation Method
Handlebar Installation


Handlebar Install Steps
- Press the folding switch to erect the rod.
- Put the handlebar into the handlebar mount.
- Adjust the angle and fasten the screws.
- Check whether the brake handle, headlight switch, dual drive switch, and instrument are fixed.
Stem Lock Steps
- Press it to the nearest position.
- Fixed bead ejection.
- Snap-fit folding clips.
13
Seat Deployment Method

- Open the fixing clips.
- Press the retaining bead to minimise.
- Release the stem lock switch.
- Press the retaining bead to minimise.

14
Seat Deployment Method (Install)

- Press the metal ring.
- Tighten the fixed buckle.
- Put it into the seat and adjust it to the right height.
- Tighten the fixed buckle.
How to Adjust the Height of the Stem

- Open the fixing clips.
- Press the fixing bead to adjust the height.
- Tighten the fixed buckle.
15
Snubber Installation

- Prepare all spare parts.
- Confirm all parts.
- Remove the original screws to retain the nuts.
- Remove the screws — 2 screws ③ + ⑧ + the original nut fixing, accessories ②.
- Accessory ① fixed left side hydraulic shock absorber.
- Screw ⑥ on the left, screw ⑤ on the right.
- Place position to fix all screws.
- Preview of the installed effect.
16
Vehicle Maintenance and Repair
Recommended Tightening Torque of Main Fasteners
The recommended tightening torque of the main fasteners in the whole vehicle (unit: N·m):
| Part | Rear wheel | Saddle | Front wheel | Front fork | Core tube | Vertical tube |
|---|---|---|---|---|---|---|
| Torque (≥) | 18 | 30 | 18 | 18 | 18 | 18 |
Regular Maintenance
Legend: A = Check | S = Adjust | D = Replace | L = Lubrication | T = Tighten
| Inspection Item | 60 Days | 180 Days | 360 Days |
|---|---|---|---|
| Handle rotation, steering parts loose/wear | A, T | S, T | A, L |
| Tire inflation is appropriate, whether the tire wear | A | A | D |
| Front and rear shaft, axle and other wear | A, L | T | D |
| The brake shoe is worn | A | D | D |
| Rim is biased, deformation | A | A | A |
| Frame and front fork is deformed/bumps | A | A | A |
| Brake effect is good | A | A | A |
| Brake handle position is appropriate | S | S | S |
| Whether the horn is ringing, the headlight is bright | A | A | A |
| Charger plug, power cord wear/broken | A | A | A |
| Cushion, handlebar height is appropriate | S | S | S |
17
After Sales Service and "Three Packs" Period
Consumer Rights & Product Information — To ensure a satisfactory experience and protect your rights as a consumer: Ask the seller for details about correct product operation (e.g., usage instructions, safety guidelines), product specifications (e.g., battery life, speed limits, weight capacity), and certification documents, including the "Three Guarantees" warranty certificate. Request the dealer's information, including company name, address, and phone number.
Note: The term "three packs" of electric scooter parts is as follows:
| Accessories | Quality Problem | Shelf Life | Three Pack Range |
|---|---|---|---|
| Motor | Cannot be used under natural conditions (except for impact and other external damage) | A year | Free maintenance |
| Meter / Accelerator | Failure under normal use | A year | Free maintenance |
| Controller | Failure under normal use | A year | Free maintenance |
| Charger | Failure under normal use | A year | Free maintenance |
| Lithium Battery | Failure under normal use; the rubber wheel is broken and badly broken | A year | Free maintenance |
Battery Warranty
- 15-Day Replacement: If the battery's rated capacity falls below 90% within 15 days of purchase, the battery is eligible for a free replacement.
- Three-Year Warranty Replacement: If the battery fails during the three-year warranty period or tests with a rated capacity below 60%, it qualifies for a free replacement. Important: The original warranty period is not reset after replacement—the remaining time from the original purchase date applies.
- Transferable Warranty: If the electric scooter is sold or transferred to a new owner, the remaining warranty period transfers to the new owner.
- Documentation Requirements: Dealers must stamp the warranty card to record replacement parts, including date of replacement, part number, and serial number (if applicable). This ensures warranty validity and tracks service history.
18
Does Not Belong to the "Three Packs" Scope and Content
- No car vouchers and "three packs" certificate
- Serial number and registration number
- Users do not follow the "instructions" and the use of improper, inadequate maintenance, improper care caused by damage
- User self repair, modification is not part of the damage caused by special repair disassembly
- Damage caused by impact and chemical corrosion
- Cannot fight against the damage caused by force majeure
- Damaged after sale
- Brake lining, fuse, tire, lighting and other consumables
- The above situation does not implement the "Three Guarantees" within the period of the "Three Guarantees", but the repair fee may be charged
Warranty Card
User Information
| User name | |
| Contact phone | |
| Contact address | |
| Postal code | |
| Car date | |
| Product models | |
| Frame number |
19
Troubleshooting
Trouble Codes
| Code | Fault Description | Resolution |
|---|---|---|
| E-001 | Motor failure | Usually the E-001 fault can still drive normally indicates that the motor Hall is bad — repair a Hall on the controller; if it cannot go, must replace the motor. |
| E-002 | Acceleration handle failure | Check throttle wiring and connections; replace accelerator if faulty. |
| E-003 | Controller failure | Send controller to authorized service center for repair or replacement. |
| E-004 | Brake failure — unplug the brake disconnect wire and see if the failure is eliminated; if not, check brake handle (front/rear brake). Not eliminated: check brake tail light for short circuit, unplug the tail light power wire. Not lifted: change the controller. | Brakes rattling: raise the handlebar 20 cm, pinch left and right brake handle, wipe both sides of the brake disc with oil. |
| E-005 | Meter display fault — charge first and wait a while, or report a fault on the meter. Battery over the controller's high-voltage protection — check if the battery is installed incorrectly, then check meter background voltage settings. | If charging is normal, headlights come on and the meter won't turn on — replace the meter. |
| E-006 | First check whether the communication line between the controller and the meter is connected correctly. Take the test meter to confirm — if not good, change the controller. | Check communication wiring between controller and meter. |
| E-007 | Motor Hall line is short-circuited — unplug the motor Hall wire to see if the situation is eliminated. | Inspect motor Hall wiring for short circuits. |
Battery Failure
| Symptom | Cause / Resolution |
|---|---|
| Charging can be turned on, everything is normal; unplug the charger shutdown or ride not far then shutdown | Change the battery |
| Charging green light; remote control pressed no sound, cannot turn on | Line insertion reverse or short circuit; battery failure |
| Random power outages during a ride, repeated more than twice | Battery failure — replace battery |
| Charging green light; remote control pressed the sound, can turn on all normal | Normal operation |
Fault Resolution
- After the battery is fully charged, the meter shows no fault code and the car won't go — check if the controller has been installed incorrectly, or the battery.
- Headlights do not light up, horn does not sound — usually first check the circuit wiring; replace the headlights if wiring is OK.
- Brakes rattling — raise the handlebar 20 cm, pinch left and right brake handle, wipe both sides of the brake disc with oil.
- If charging is normal, headlights come on and the meter won't turn on — replace the meter.
20
-
Batteria Originale per Monopattini Elettrici BOYUEDA
Prezzo di listino Da €349,00 EURPrezzo di listinoPrezzo unitario per€309,00 EURPrezzo scontato Da €349,00 EURRate payment with 0% interest


-
Motore Originale (con pneumatico) per Monopattini Elettrici Boyueda
Prezzo di listino Da €309,00 EURPrezzo di listinoPrezzo unitario per€449,00 EURPrezzo scontato Da €309,00 EURRate payment with 0% interest
In offerta -
Originale Forcella Anteriore Rown (Albero Teering) Per Boyueda Monopattini Elettrici
Prezzo di listino €149,00 EURPrezzo di listinoPrezzo unitario per€159,00 EURPrezzo scontato €149,00 EURRate payment with 0% interest
In offerta -
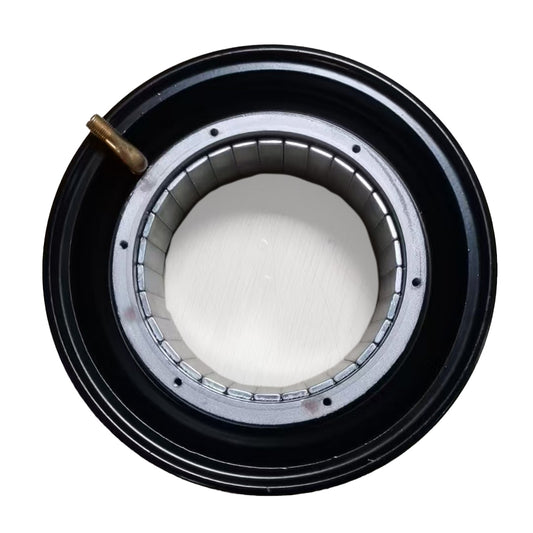
Cerchio / Mozzo Originale per Monopattini Elettrici Boyueda
Prezzo di listino Da €149,00 EURPrezzo di listinoPrezzo unitario per -
Piastra acrilica trasparente per la posizione originale del pedale dello scooter Boyueda S5-11
Prezzo di listino €129,00 EURPrezzo di listinoPrezzo unitario per -
Ammortizzatore Sterzo Originale Per Boyueda S5-11 / S3-11
Prezzo di listino €129,00 EURPrezzo di listinoPrezzo unitario per€105,00 EURPrezzo scontato €129,00 EURRate payment with 0% interest
-
 €20OFF
Casco Integrale per Scooter
Prezzo di listino €119,00 EURPrezzo di listinoPrezzo unitario per€139,00 EURPrezzo scontato €119,00 EURRate payment with 0% interest
In offerta -
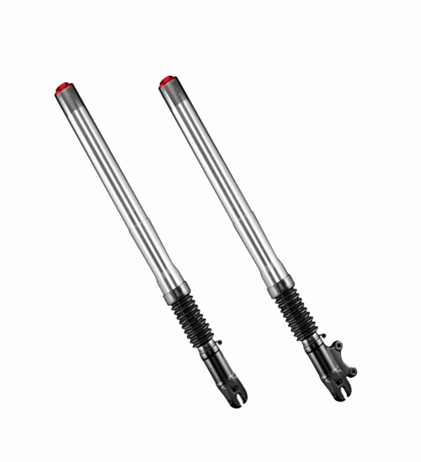
Forcella anteriore originale per monopattini elettrici Boyueda
Prezzo di listino Da €119,00 EURPrezzo di listinoPrezzo unitario per€209,00 EURPrezzo scontato Da €119,00 EURRate payment with 0% interest
In offerta -
Set Sedile Originale per Boyueda E-scooter
Prezzo di listino €109,00 EURPrezzo di listinoPrezzo unitario per€109,00 EURPrezzo scontato €109,00 EURRate payment with 0% interest
-
Set completo di pezzi pieghevoli per monopattini elettrici Boyueda
Prezzo di listino Da €99,00 EURPrezzo di listinoPrezzo unitario per -
Albero motore originale per monopattini elettrici Boyueda
Prezzo di listino €95,00 EURPrezzo di listinoPrezzo unitario per€115,00 EURPrezzo scontato €95,00 EURRate payment with 0% interest
In offerta -
Display originale LY 810 con schede NFC per monopattini elettrici Boyueda S5-11, M2 e Q7 Pro Max
Prezzo di listino €89,00 EURPrezzo di listinoPrezzo unitario per -
Sedile Originale per Monopattino Elettrico Boyueda
Prezzo di listino €79,00 EURPrezzo di listinoPrezzo unitario per€109,00 EURPrezzo scontato €79,00 EURRate payment with 0% interest
In offerta -
Controller Originale per Monopattini Elettrici BOYUEDA
Prezzo di listino Da €79,00 EURPrezzo di listinoPrezzo unitario per€99,00 EURPrezzo scontato Da €79,00 EURRate payment with 0% interest
In offerta


-
BOYUEDA S5-11 Monopattino Elettrico Fuoristrada da Montagna con Display Bluetooth e Ammortizzatore di Sterzo
 6000W Brush-Less Motor
 60V 38Ah UL certification
 120KM Max Range
 85KM/h Max SpeedPrezzo di listino €1.179,00 EURPrezzo di listinoPrezzo unitario per
€1.499,00 EURPrezzo scontato €1.179,00 EURRate payment with 0% interest
In offerta -
BOYUEDA S3-11 Potente monopattino elettrico da fuoristrada per montagna
6000W Brush-Less Motor
60V 38Ah UL certification
120KM Max Range
85KM/h Max SpeedPrezzo di listino €1.079,00 EURPrezzo di listinoPrezzo unitario per€1.399,00 EURPrezzo scontato €1.079,00 EURRate payment with 0% interest
In offerta -
BOYUEDA Q7 Pro Max Smart Bluetooth Con Display Monopattino Elettrico Urbano Pieghevole
3200W Brush-Less Motor
52V 28Ah UL certification
110KM Max Range
70KM/h Max SpeedPrezzo di listino €829,00 EURPrezzo di listinoPrezzo unitario per€999,00 EURPrezzo scontato €829,00 EURRate payment with 0% interest
In offerta -
BOYUEDA Q7 PRO Monopattino Elettrico Pieghevole per Città
3200W Brush-Less Motor
52V 19Ah UL certification
70KM Max Range
70KM/h Max SpeedPrezzo di listino €719,00 EURPrezzo di listinoPrezzo unitario per€899,00 EURPrezzo scontato €719,00 EURRate payment with 0% interest
In offerta -
BOYUEDA STK-01 Moto da cross elettrica (Nuovo arrivo 2026)
3000W(Peak) Brush-Less Motor
60V20.8AH UL certification
37KM Max Range
55KM/h(37MPH) Max SpeedPrezzo di listino €1.099,00 EURPrezzo di listinoPrezzo unitario per€1.599,00 EURPrezzo scontato €1.099,00 EURRate payment with 0% interest
Esaurito


