


LY 810 Display Manual
LY 810 Display Manual
![]() This display manual is currently applicable to BOYUEDA S5-11 and Q7 PRO MAX. For reference only.
This display manual is currently applicable to BOYUEDA S5-11 and Q7 PRO MAX. For reference only.

Fault Status Display
When the symbol is flashing, press the M/3 key to switch the display interface to the E interface. The corresponding number under the interface indicates the specific fault content. The fault statuses are as follows:
- E-001: Motor Hall fault
- E-002: Handle failure
- E-003: Controller failure
- E-004: Brake failure
- E-005: Voltage fault
- E-006: Communication failure (Instrument does not receive controller signal)
- E-007: Communication failure (Controller does not receive instrument signal)
Wiring Mode
- Red wire (D+): Positive input of power supply
- Black wire (GND): Negative pole of power supply
- Blue wire (DS): Controller switch lock
- Green wire (Tx): Communication transmission
- Yellow wire (Rx): Communication reception
- Grenade Hall Signal Station
Special Features
- The meter is equipped with Bluetooth and NFC functionality, including password boot.
- NFC Icon: Represents the NFC function.
Background Settings (P95)
There are three options for P95 in the instrument background:
- 0: No password or NFC swipe card required to boot. Simply press the boot button briefly.
- 1: Only NFC card can be used to boot. Press the power button to display the letter N, then swipe the NFC card in the designated area (marked with "NFC") to boot.
- 2: Both password and NFC swipe card can be used to boot. The default password is 1234. Enter the password or swipe the NFC card within 5 seconds of pressing the boot button.
Bluetooth Connection
-
Android Users: Scan the QR code to download the app.

http://xcx.liyazn.com/mytrip.apk
-
iPhone Users: Search for the app in the App Store. App Name: My-Trip

- Open the app, click the Bluetooth icon, and search for the Bluetooth name starting with LIVIAE.
- Click the Bluetooth icon to jump to the login interface.
- Note: Registration is required to modify parameters and prevent unauthorized changes.
How to Control Your BOYUEDA E-Scooter with Your Phone APP?
NFC Card Usage
- Factory Cards: Three cards are provided—blue (main card) and white (secondary cards).
- Blue Main Card: Acts as the master key. It cannot boot the device but is required to pair new secondary cards.
- White Secondary Cards: Used for booting. If lost, the blue main card is needed to pair a new secondary card.
-
Pairing Process:
- Short press the boot button (within 5 seconds) and swipe the blue main card in the NFC area.
- Swipe the white secondary cards when prompted (numbers 1, 2, and 3 will appear on the meter).
Button Functions
- Button 1: Short press to turn on; long press to shut down.
- Button 2: Short press to switch headlights on/off; long press to toggle start modes.
- Button 3: Short press to cycle through ODO/TRIP/TIME/fault code E/voltage V; long press to enter speed limit mode.
- Button 4: Short press to switch between single/dual motor modes.
- Button 5: Short press to cycle through gears (up to 3 gears); long press to toggle the pedestrian icon.
- Buttons 3 + 5: Press simultaneously to enter the background settings.
Background Parameters
This parameter is relatively complex and is generally not required for use.
It is highly recommended to use the "my-trip" APP for control to avoid incorrect settings.
- P01: Backlight brightness (1-10)
- P02: Mileage unit (0: km, 1: mile, 2: km/mile full display)
- P03: Voltage level (24V, 36V, 48V, 52V, 60V, 72V)
- P04: Sleep time (0: no sleep; 1-60: sleep time in minutes)
- P06: Wheel size (unit: inch; accuracy: 0.1)
- P07: Number of magnets (range: 1-100)
- P09: Zero start setting (0: zero start; 1: non-zero start)
- P10: Drive mode (0: assist drive; 1: electric drive; 2: power drive)
- P11: Assist sensitivity (1-24)
- P12: Starting torque (0-5; 0: weakest, 5: strongest)
- P13: Booster plate magnet type (5, 8, 12)
- P15: Motor drive signal percentage (set to 100% for full speed)
- P16: Real-time cruise function (0: no function; 1: enabled)
- P19: Taillight setting (0: always on; 1: synchronized with headlights)
- P20: Boot settings (0: soft boot; 1: normal boot (50%); 2: hard boot (100%))
- P21: Electronic brake strength (0: none; 1: enabled (1-10))
- P92: Handle Hall setting (0: no rotary handlebar function; 1: enabled)
- P93: Change password (press Button 3 to modify)
- P95: Boot mode (0: no password/NFC; 1: NFC only; 2: password/NFC)
- P96: Speed limit 40km setting (0: cannot cancel; 1: can lift; 2: cannot lift)
- P97: Drive icon setting (0: no function; 1: single/dual drive switch; 2: dual drive default)
- P98: One-click start (0: no function; 1: enabled)
- P99: One-key recovery (long press Button 3 for 5-6 seconds to reset all parameters)
Additional Notes
- ODO Zero Clearing: Under the ODO parameter interface, briefly press Button 3, then press and hold for 5-6 seconds until the digits clear.
- Product Upgrades: The display information may differ from the manual due to product upgrades, but this will not affect normal use.
-
Original Battery For BOYUEDA E-scooters
Regular price From €349,00 EURRegular priceUnit price per€309,00 EURSale price From €349,00 EURRate payment with 0% interest


-
Original Motor(With tire) For Boyueda E-scooters
Regular price From €309,00 EURRegular priceUnit price per€449,00 EURSale price From €309,00 EURRate payment with 0% interest
Sale -
Original Front Fork Rown (Teering Shaft) For Boyueda E-scooters
Regular price €149,00 EURRegular priceUnit price per€159,00 EURSale price €149,00 EURRate payment with 0% interest
Sale -
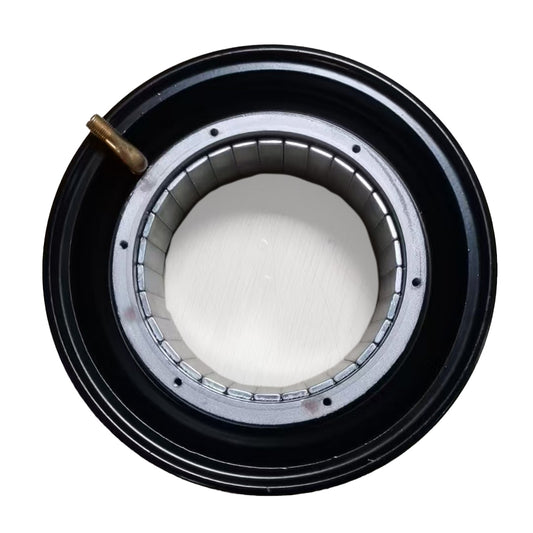
Original Rim / Hub For Boyueda E-scooters
Regular price From €149,00 EURRegular priceUnit price per -
Transparent acrylic plate for the original pedal position of Boyueda S5-11 scooter
Regular price €129,00 EURRegular priceUnit price per -
Original Steering Damper For Boyueda S5-11 / S3-11
Regular price €129,00 EURRegular priceUnit price per€105,00 EURSale price €129,00 EURRate payment with 0% interest
-
 €20OFF
Scooter Full Face Helmet
Regular price €119,00 EURRegular priceUnit price per€139,00 EURSale price €119,00 EURRate payment with 0% interest
Sale -
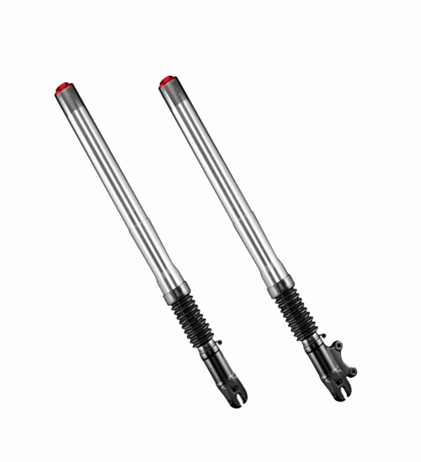
Original Front Fork For Boyueda E-scooters
Regular price From €119,00 EURRegular priceUnit price per€209,00 EURSale price From €119,00 EURRate payment with 0% interest
Sale -
Original Seat Set For Boyueda E-scooter
Regular price €109,00 EURRegular priceUnit price per€109,00 EURSale price €109,00 EURRate payment with 0% interest
-
Original Complete set of folding parts for Boyueda E-scooters
Regular price From €99,00 EURRegular priceUnit price per -
Original Motor Shaft For Boyueda E-scooters
Regular price €95,00 EURRegular priceUnit price per€115,00 EURSale price €95,00 EURRate payment with 0% interest
Sale -
Original LY 810 Display Meter with NFC Cards for Boyueda S5-11 & Q7 Pro Max E-scooters
Regular price €89,00 EURRegular priceUnit price per -
Original Seat For Boyueda E-scooter
Regular price €79,00 EURRegular priceUnit price per€109,00 EURSale price €79,00 EURRate payment with 0% interest
Sale -
Original Controller for BOYUEDA E-scooters
Regular price From €79,00 EURRegular priceUnit price per€99,00 EURSale price From €79,00 EURRate payment with 0% interest
Sale


-
BOYUEDA S5-11 Mountain Off-Road E-Scooter Bluetooth Display with Steering Damper
 6000W Brush-Less Motor
 60V 38Ah UL certification
 120KM Max Range
 85KM/h Max SpeedRegular price €1.179,00 EURRegular priceUnit price per
€1.499,00 EURSale price €1.179,00 EURRate payment with 0% interest
Sale -
BOYUEDA S3-11 Powerful Mountain Off-Road E-Scooter
6000W Brush-Less Motor
60V 38Ah UL certification
120KM Max Range
85KM/h Max SpeedRegular price €1.079,00 EURRegular priceUnit price per€1.399,00 EURSale price €1.079,00 EURRate payment with 0% interest
Sale -
BOYUEDA Q7 Pro Max Smart Bluetooth Display City E-Scooter Foldable
3200W Brush-Less Motor
52V 28Ah UL certification
110KM Max Range
70KM/h Max SpeedRegular price €829,00 EURRegular priceUnit price per€999,00 EURSale price €829,00 EURRate payment with 0% interest
Sale -
BOYUEDA Q7 PRO Foldable City E-Scooter
3200W Brush-Less Motor
52V 19Ah UL certification
70KM Max Range
70KM/h Max SpeedRegular price €709,00 EURRegular priceUnit price per€899,00 EURSale price €709,00 EURRate payment with 0% interest
Sale


